Hello, we present the new version of DASH-PRO.
DASH-PRO version 3.0.0 comes with a new look, updated to improve visualization, aligned with the most modern dashboard design concepts.
You can update your DASH-PRO today and enjoy the new dashboard and new features that version 3.0.0 brings. Check out the update process below.
For this:
1. Disconnect the DASH-PRO from the car harness:
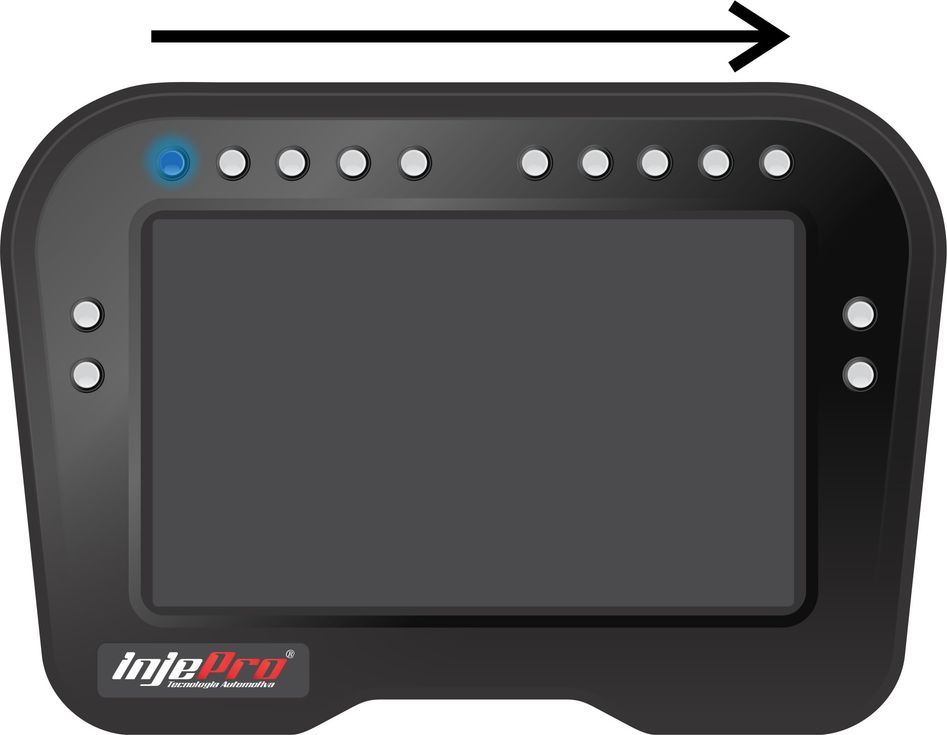
2. Using the USB cable that comes with the DASH-PRO, connect the USB cable to your Notebook or Desktop. Once this is done, it will boot and the Blue LED will start flashing.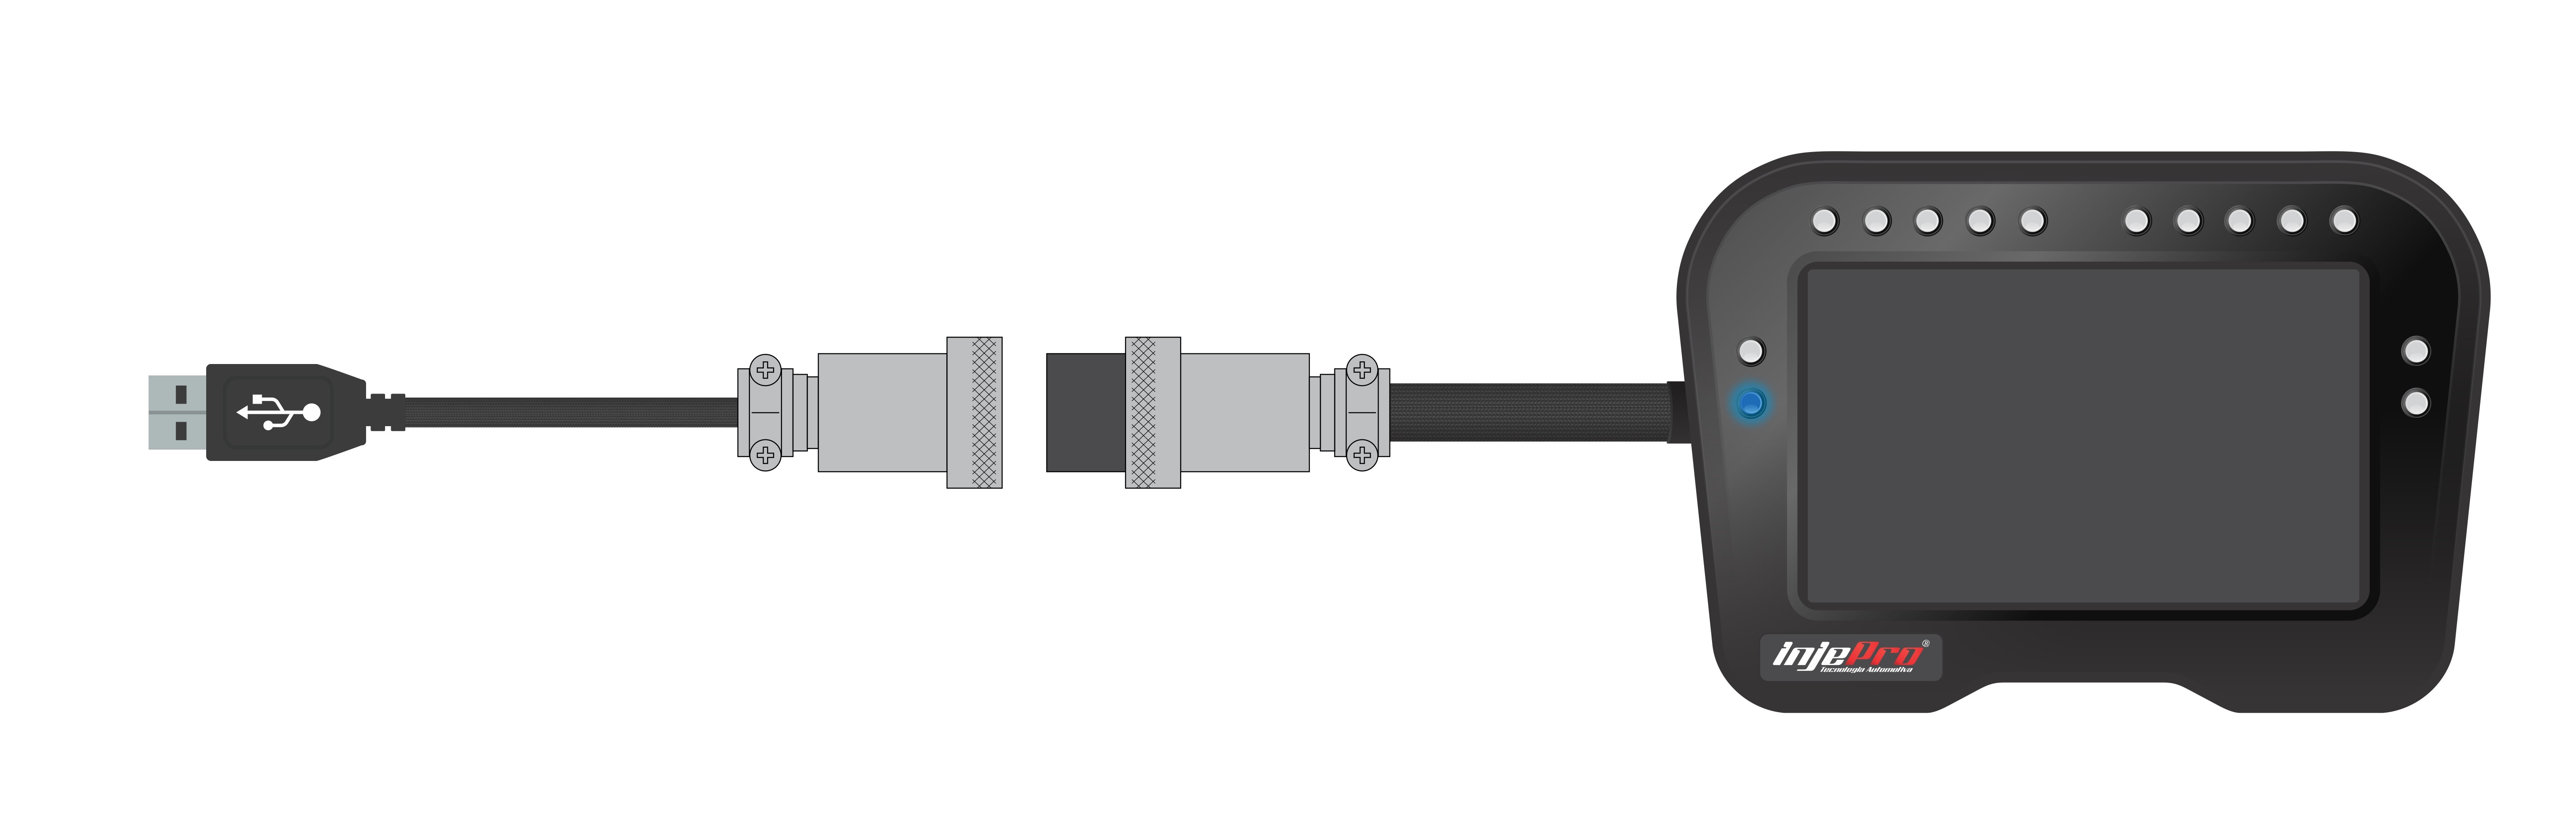
3. Open the DASH-PRO software if you don't have this software yet, download it from our website www.injepro.com
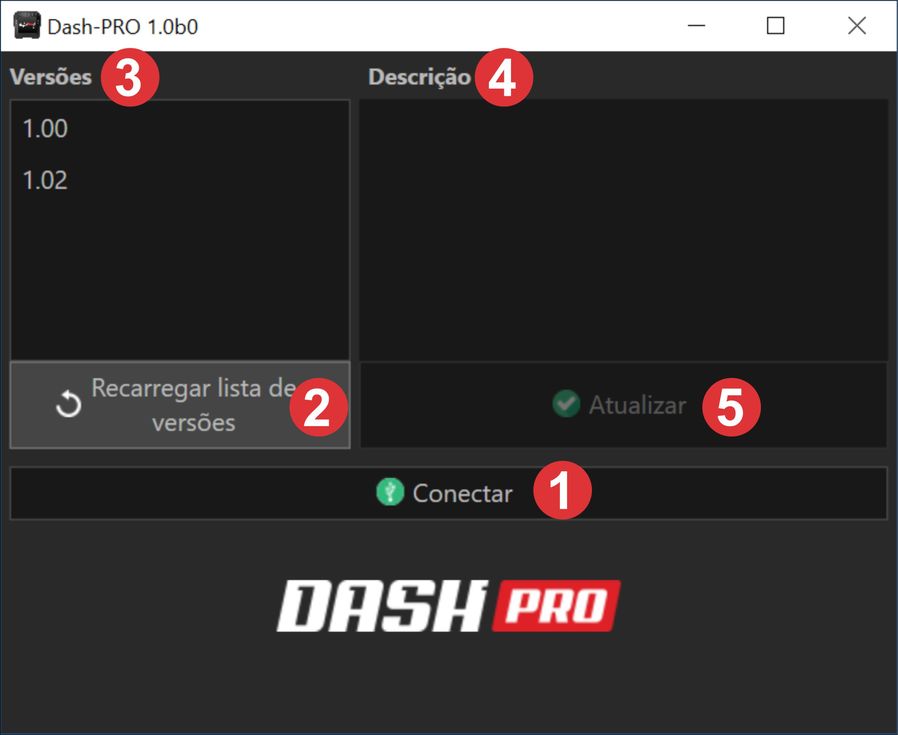
On this screen you can view the list of versions available for update, the description of the update.
4. Wait for the versions to load in the list on the left side of the software;
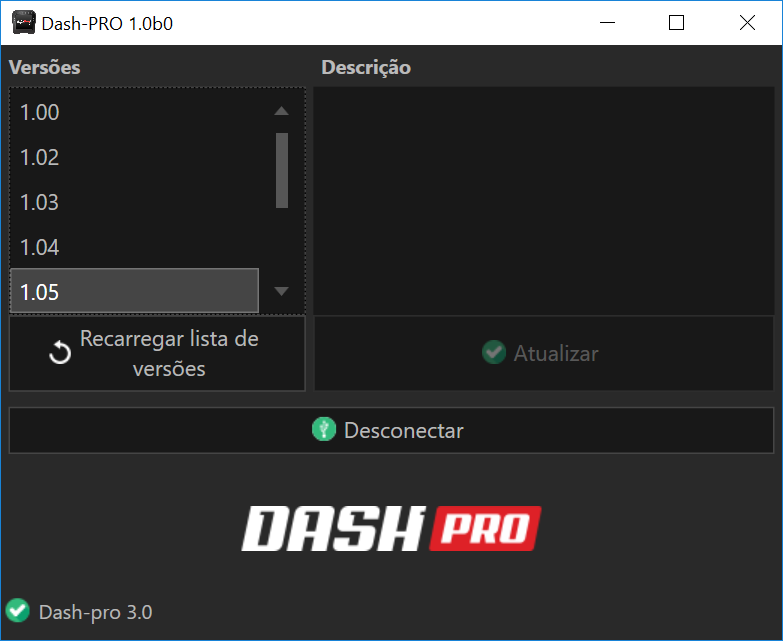
5. When version 3.0.0 appears, select it;
6. Click “Update”;

When you click update, a window with instructions and confirmation will open. Read it carefully to avoid problems when updating.
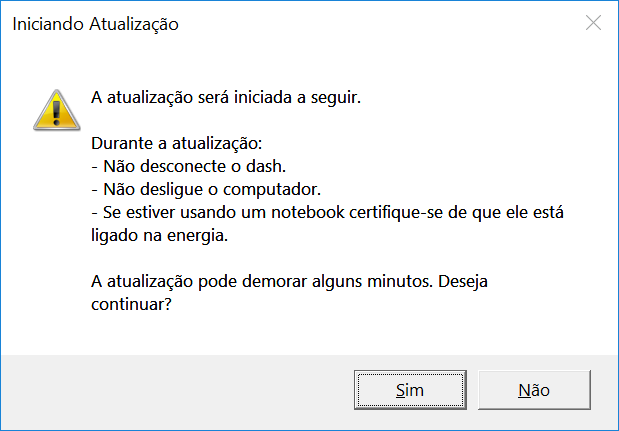
7. Click “Yes” if you want to confirm the update or “No” to cancel the procedure.
8. Wait for the update;
9. You can monitor the update progress on the software progress bar, or on the DASH-PRO LEDs, which will light up blue as the update progresses;
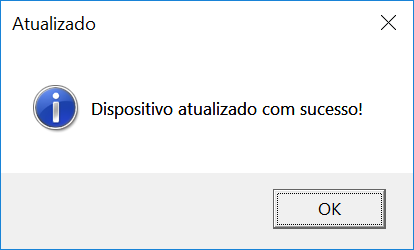
10. You will receive a message that the device has been updated successfully. Click “Ok” and close the Software.
Done, your Dash is now updated.
DASH-PRO Version 3.0.0 continues to work with our EFI-PRO/LIGHT V2, S3000, S4000, S4500, SFI, and S8000 modules. However, some functions are only available for S8000 Version 7.0.0. So we will now demonstrate how to update your S8000 and prepare it to work with DASH-PRO.
1. Remove your S8000 from the car's wiring harness;
2. Using a USB cable, connect the module to a PC or notebook;
3. Open the S8000 software if you don't have this software yet, please download it from our website www.injepro.com
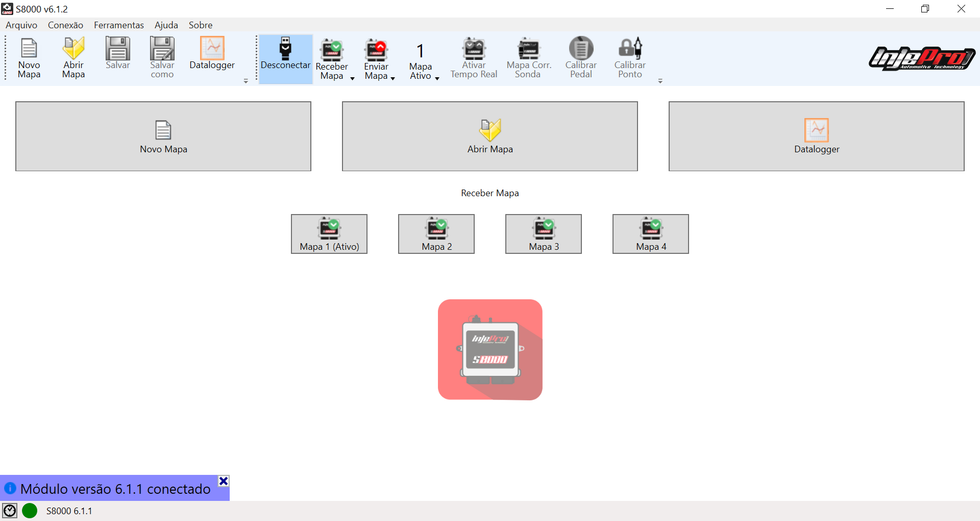
4. After opening the software, wait for it to connect to the module;
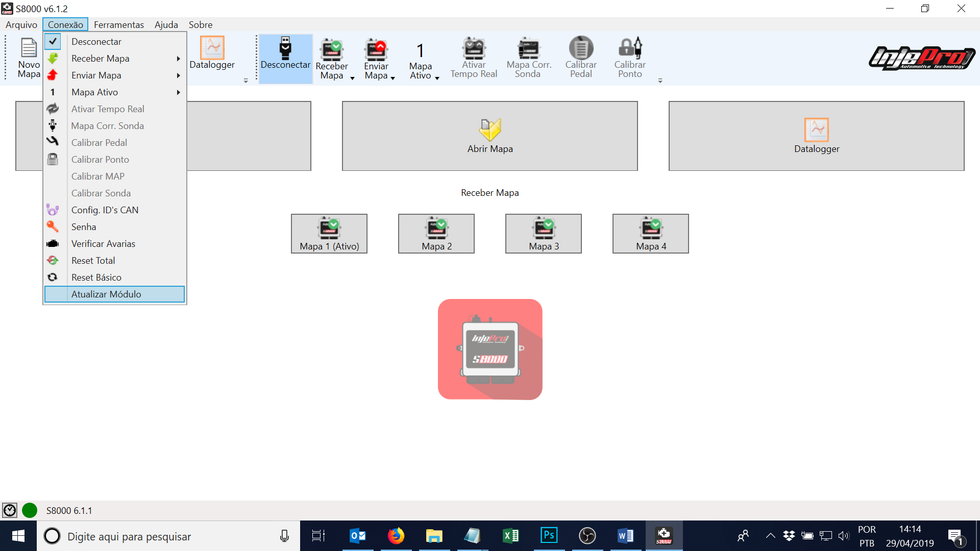
5. With this, go to the “Connection” menu and click on “Update Module”;
6. In the new window that appears, wait for the list of versions on the left;
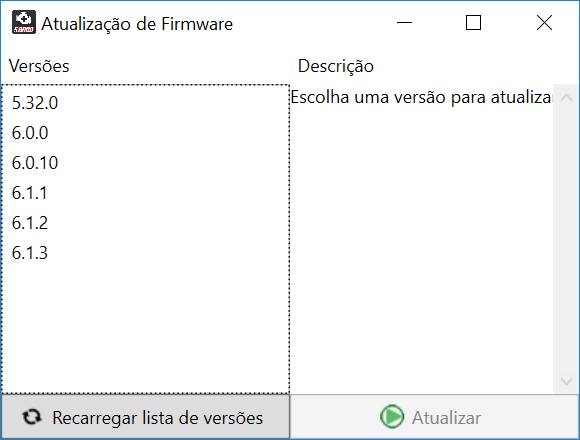
7. When version 7.0.0 appears, select it and click “Update”;

8. When you click update, an instruction and confirmation window will open. Read it carefully to avoid problems when updating.
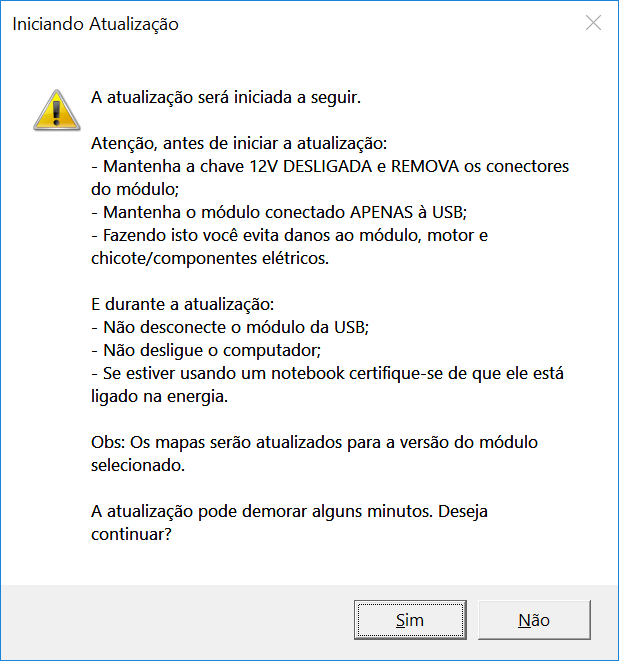
9. Click “Yes” if you want to confirm the update or “No” to cancel the procedure.
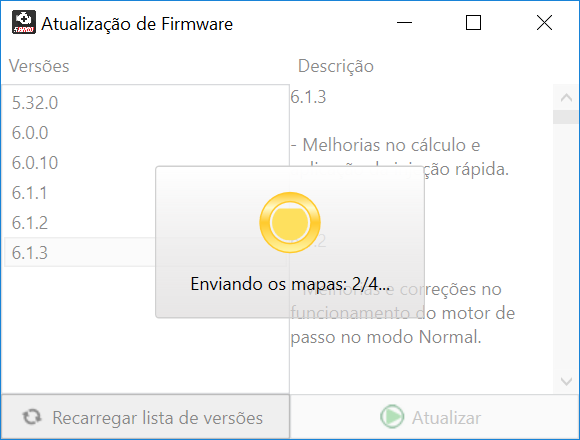
10. Wait for the update;
11. You can track the update progress on the software progress bar;
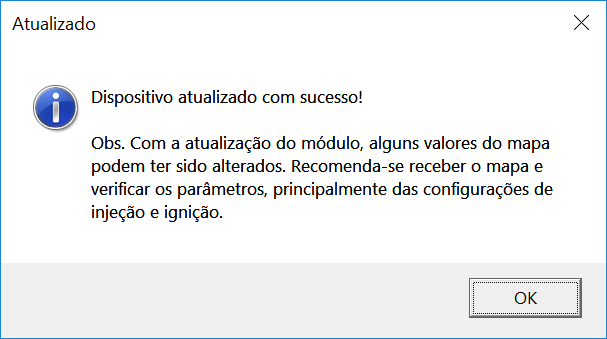
12. You will receive a message that the device has been updated successfully. Click “Ok”.
13. Close the update window and receive your active map in the module
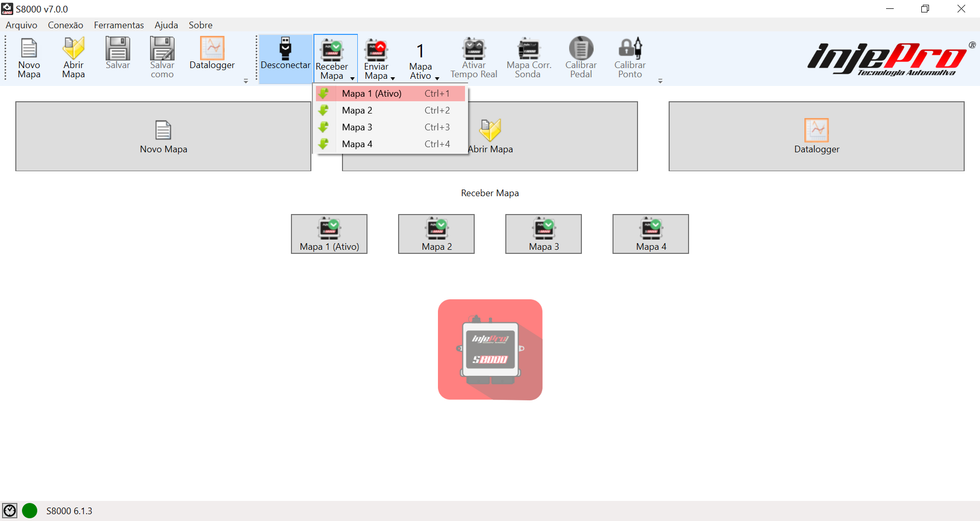
14. Go to the Sensors and Calibrations group and click on CAN
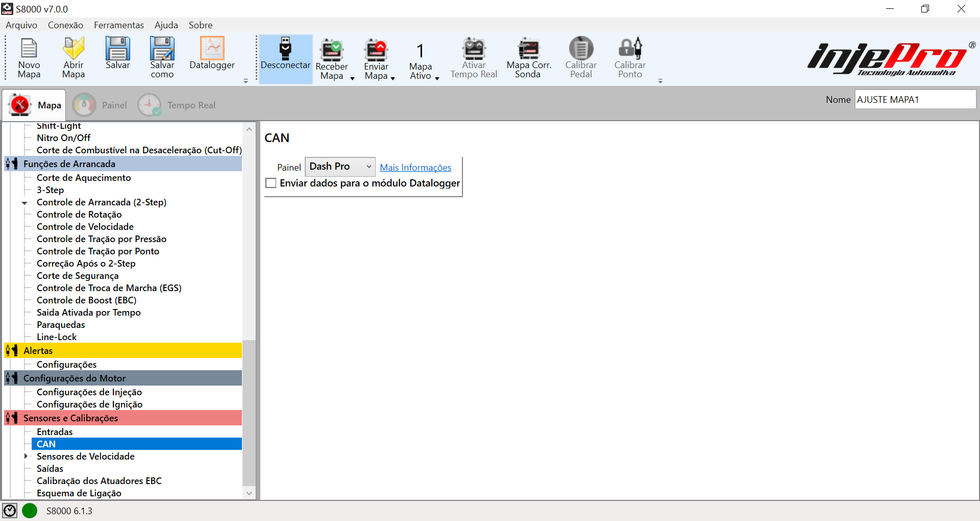
15. Make sure the panel is set to DASH-PRO
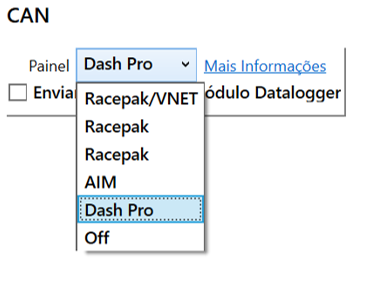
16. If it is not, change it and send the map
17. That's it, your S8000 is ready for full communication with DASH-PRO.
With Dash Pro and your updated INJEPRO, check the instruction guide to use the new functions.
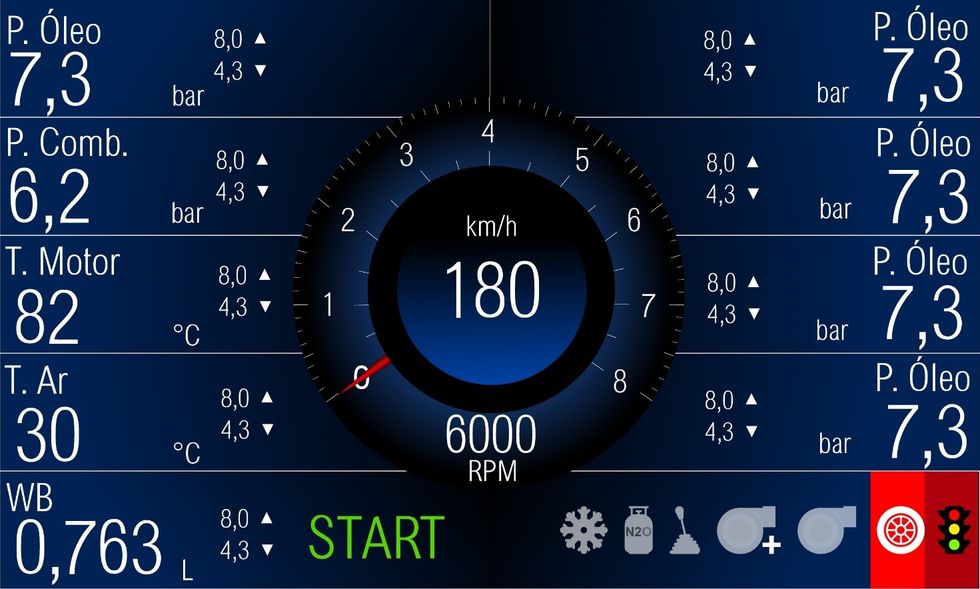
The Dash Pro panel has 18 dials, including 1 central numeric dial, 1 needle dial, and 9 side numeric dials. In addition, we have 7 fixed digital dials, in the lower right part, showing the status of buttons.
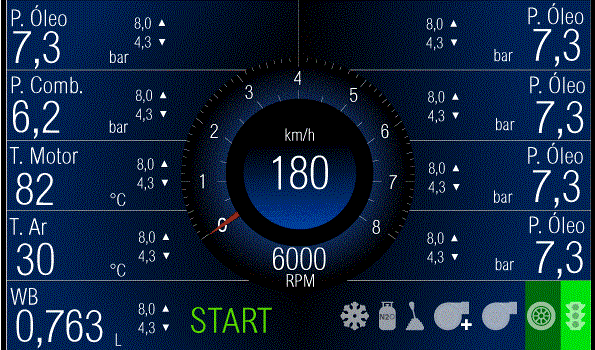
The side displays show the maximum and minimum values reached since they were reset. These values are saved in memory and are retained even after the DASH-PRO is turned off. To reset the maximum and minimum values of any channel, simply click on one of the values of the desired channel.
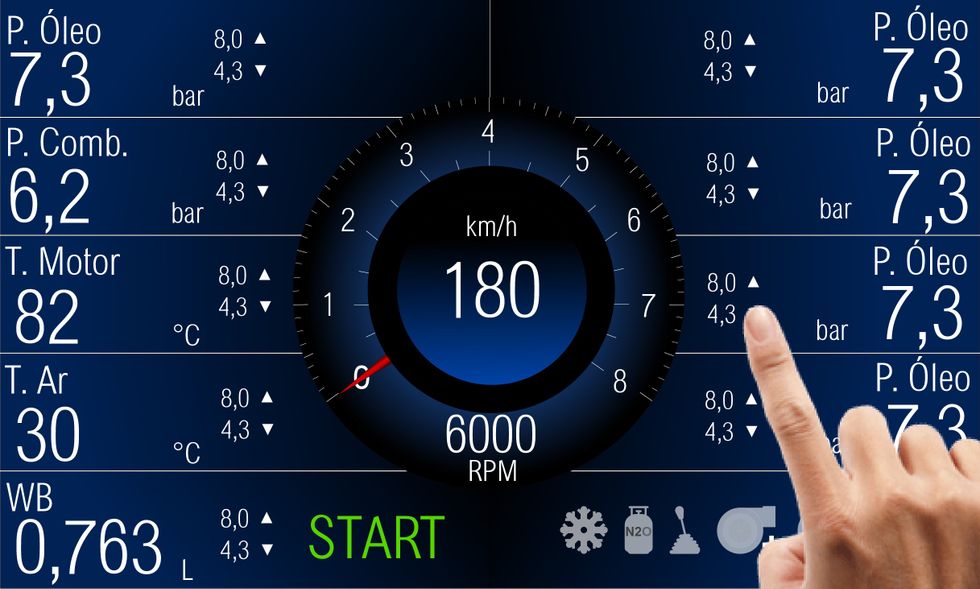
We have maintained the freedom that the previous panel had, that is, each of these dials is configurable.
Version 3.0.0 of DASH-PRO brings the Start/Stop function. With it, you can start and stop the engine using a button, present in the Dash Pro update.
We will now demonstrate how to configure this DASH-PRO function on your S8000.
Note: to use this function the S8000 must be at version 7.0.0.
1. Open the S8000 software and connect your module with the USB cable;
2. Receive the active map from the module;
3. In the navigation bar on the left, look for the "Start/Stop Function" which is in the "Other Functions" group;
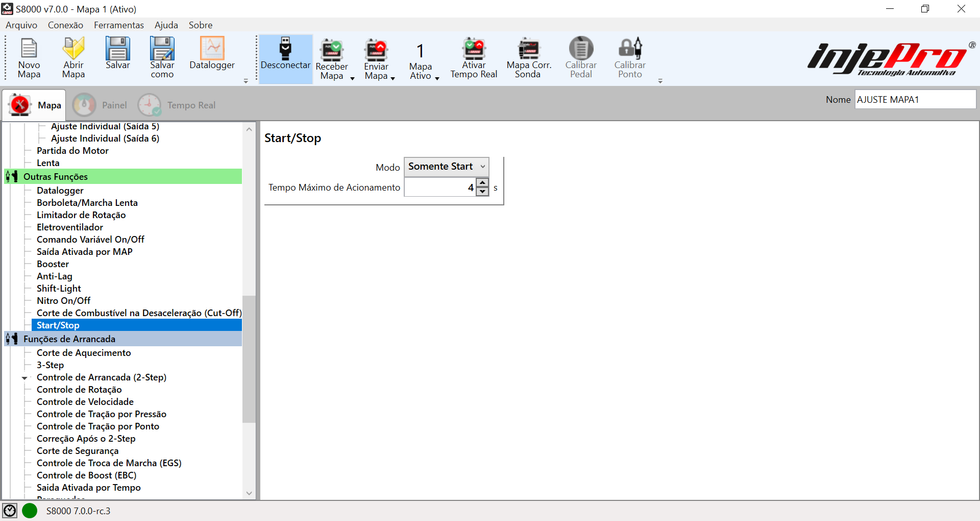
4. Here you configure the details of how the function works:
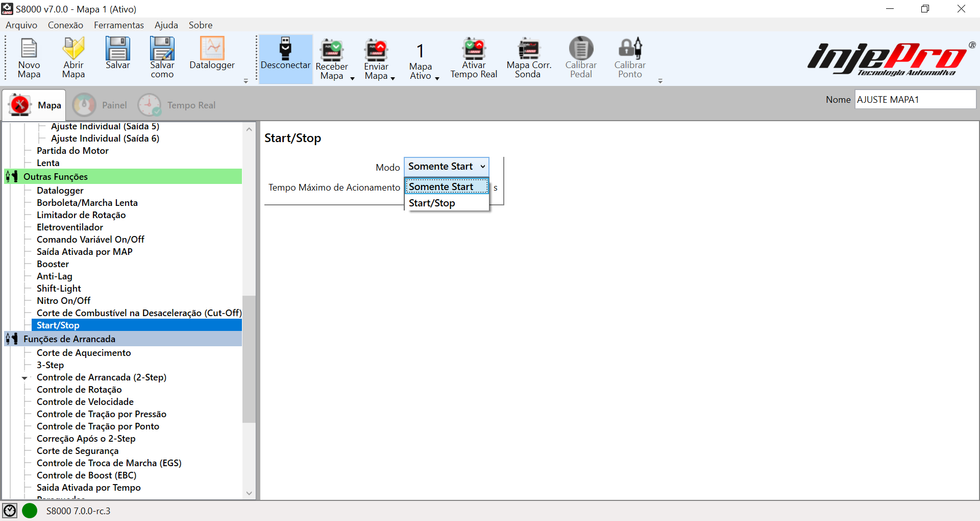
5. First, you configure whether the button will only be used to start the engine, or whether you can also turn it off;
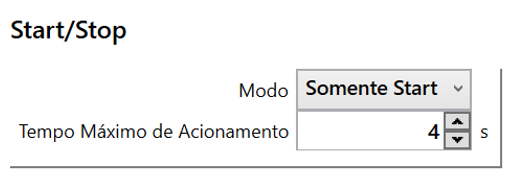
6. And finally, in the “Maximum Activation Time” option, you set how long the starter motor will remain activated trying to start the engine in seconds;
7. With these parameters configured, let's move on to the injection output settings;
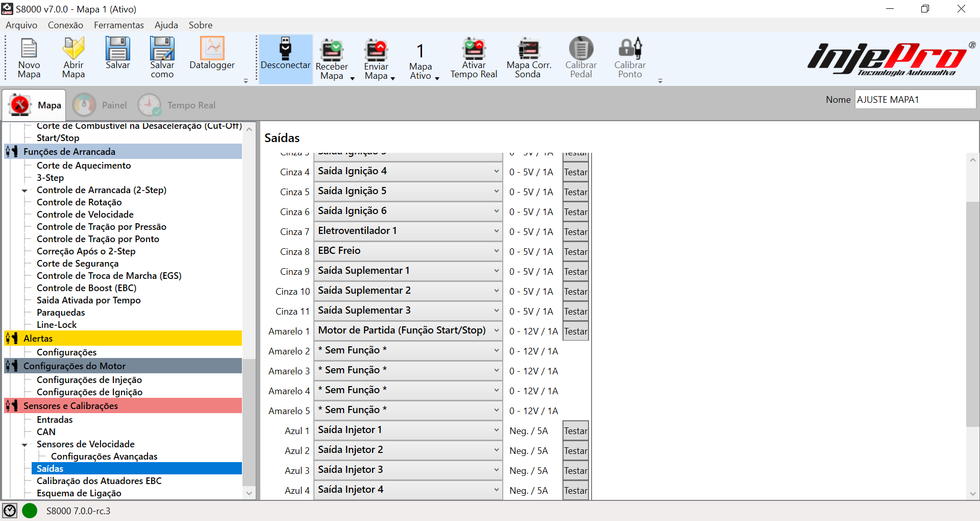
8. Here we configure which of the outputs will be connected to the starter motor relay.
9. You can configure gray outputs 9 to 11, yellow outputs 1 to 4, or any of the blue outputs.
10. After this configuration we can send the map;
11. Now turn on the car and wait for DASH-PRO to initialize;
12. Click the START button and watch your starter motor start;
Function of the Drag Cut button
DASH-PRO version 3.0.0 allows switching the function of the Launch Cut button between Burnout and Two-Step, reducing the use of an injection input.
After the update, if you have any input configured as Heating Cut, you can unconfigure it, as it will no longer be needed. And beyond that, you don't need to do anything else.
Turn on the car and wait for the DASH-PRO to initialize.
Notice in the bottom right corner of the panel that we have two icons with a green background. These icons are the LEDs indicating the burnout and two-step buttons, respectively, and the green background indicates that the burnout button is in Two-Step mode.
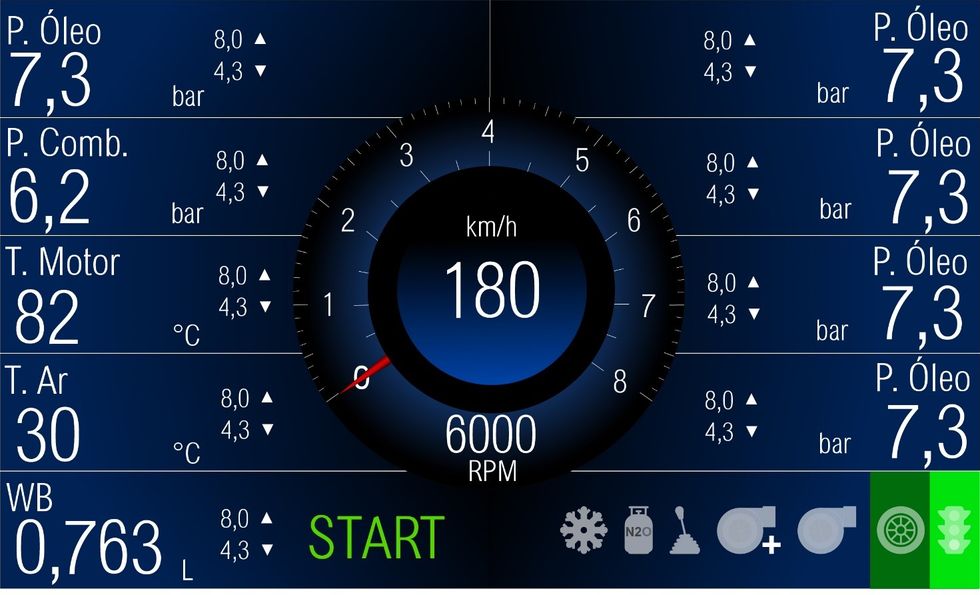
By pressing the Drag Cut button we can see that the Two-Step LED is lit.
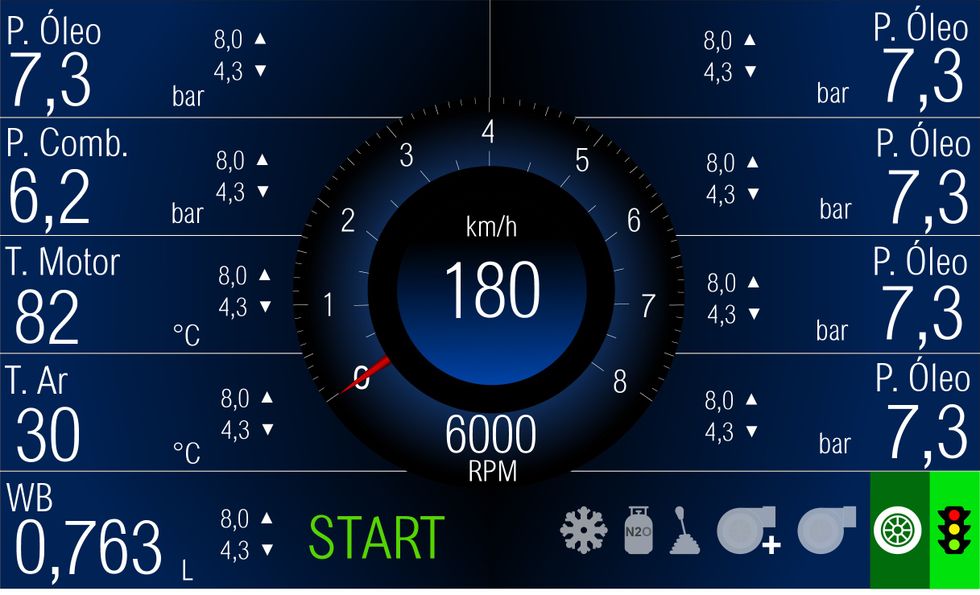
Pressing on these icons will change the background to red, indicating that the drag cut button is in Burnout mode.
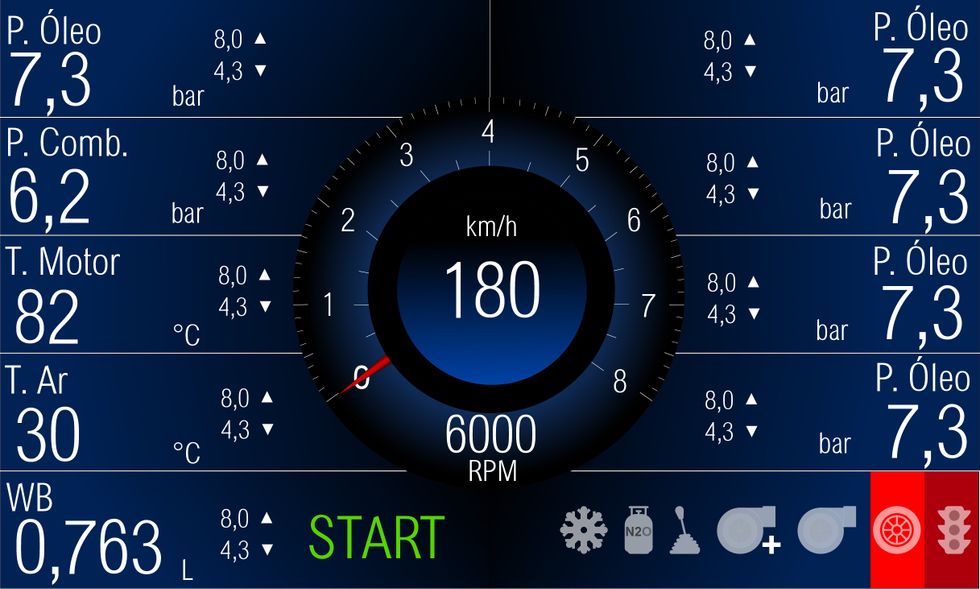
By pressing the Start Cut button we can see that the burnout LED is lit.
Now let's talk about the new S8000 map settings.
DASH-PRO version 3.0.0 brings new S8000 map functions to configure directly on it. All of these are within the Start Functions.
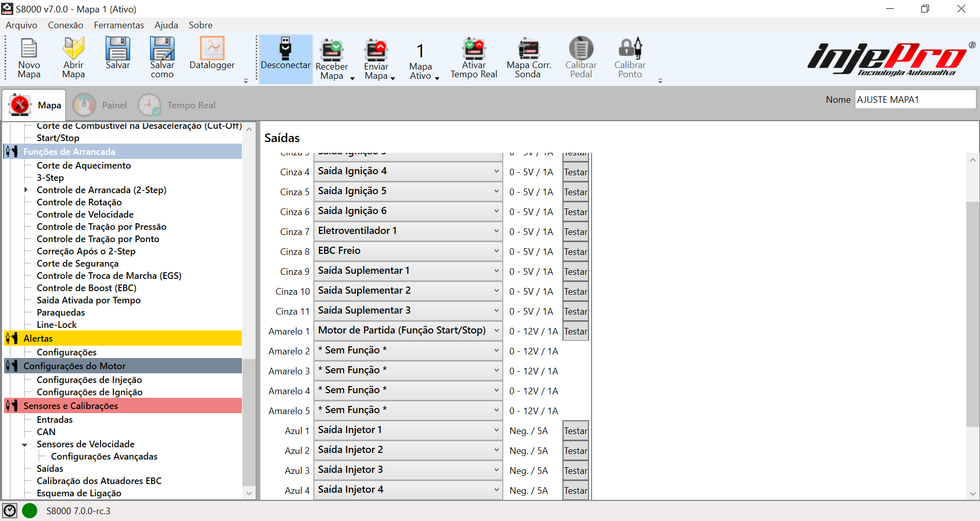
The following settings have been entered:
• Pressure Traction Control;
• Point Traction Control;
• Correction After Two-Step;
• Security Cut;
• Gear Shift Control (EGS);
• Boost Control (EBC);
• Time Activated Output;
• Parachute;
• Line-Lock.
Let's look at the main ones here, which are the EGS and the EBC.
Firstly the Gear Shift Control (EGS):
When you access it, you will see the general gear change settings, such as:
• Straing Gage sensitivity;
• Forces and mode of action;
• And Ignition Cut Percentage.
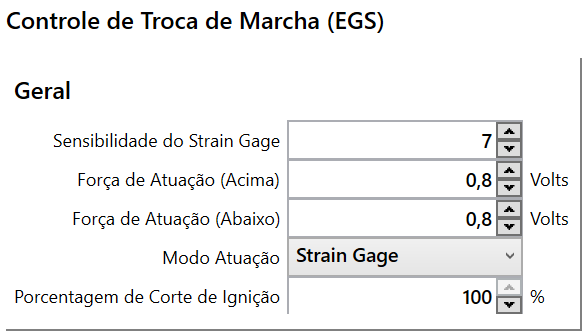
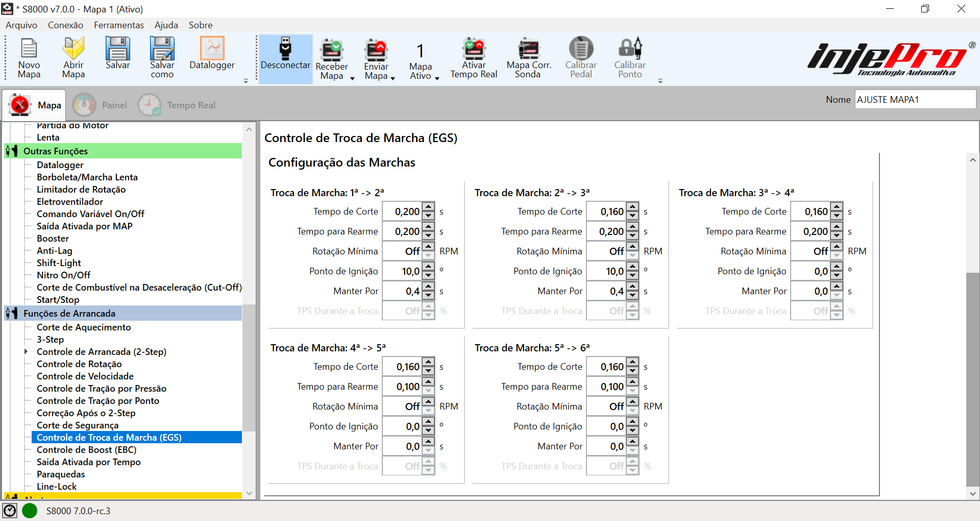
Scrolling down the bar we can see the EGS stages, where for each gear change we configure:
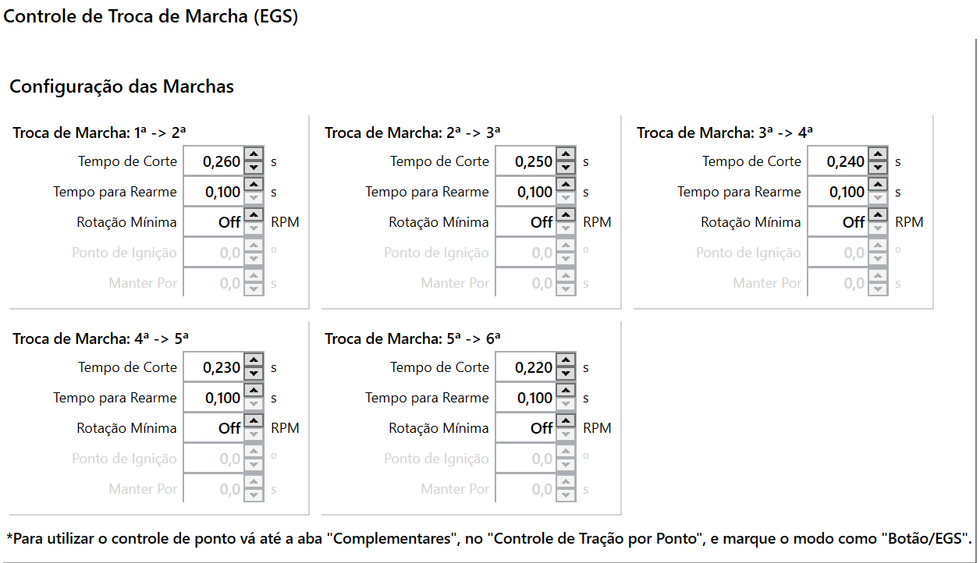
• Cutting Time;
• Time to Reset;
• Minimum Rotation;
• Ignition Point;
• Ignition point application time (Hold For).
One detail to note is about these last two fields (Ignition Timing and Hold For). To enable them, the Point Traction Control must be in "Button/EGS" mode. To do this:
1. Go back to the Launch Functions;
2. Enter Point Traction Control;
3. Choose the mode as "Button/EGS";
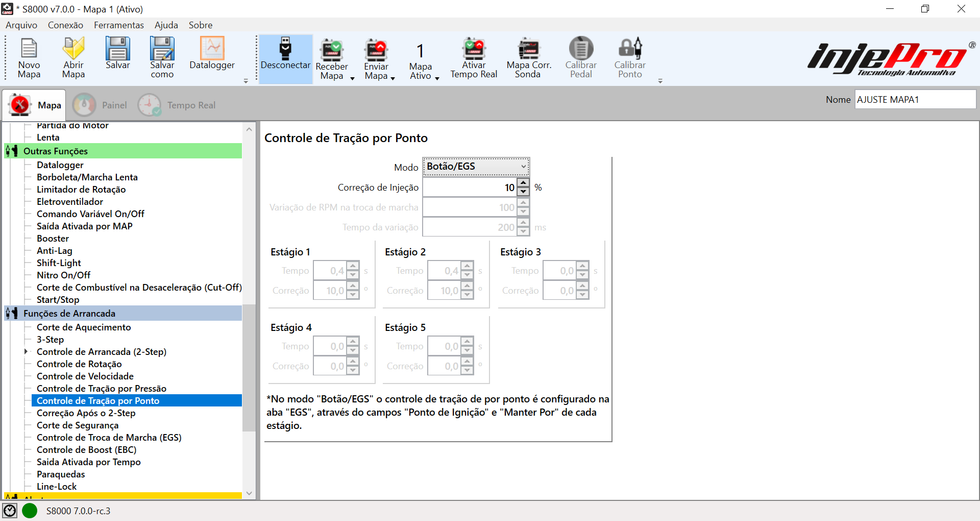
4. Go back to the Launch Functions again;
5. Enter the EGS;
6. Go to the stage settings;
7. Notice that the fields are now enabled for editing.
Now let's go to Boost Control (EBC):
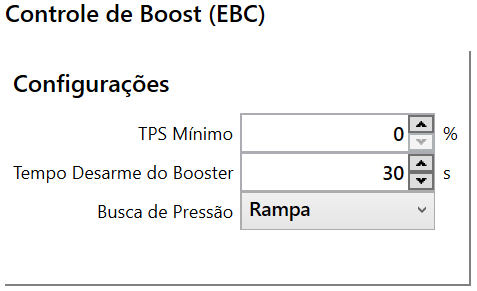
Entering the EBC configuration, we first see the general settings, such as minimum TPS, disarm time and pressure search mode.
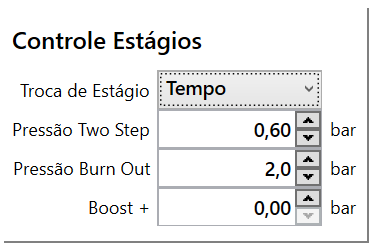
Going to the next screen we see the stage control fields, with exchange mode, target pressures in two-step and burnout, and the increase in the target when pressing the boost + button;
Going to the next screen we have the EBC stage settings, where we configure the initial and final pressures, and, depending on the exchange mode, the time, rpm or speed.
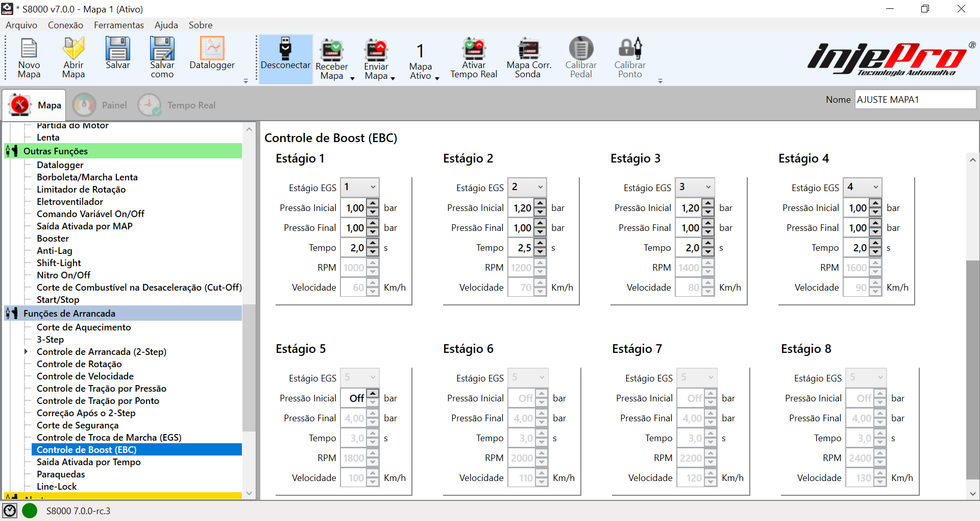
Here we also configure the equivalence between the EGS stages and the EBC, which allows us to join EBC stages in order to create a better ramp of pressure targets for the same gear.
All of this is displayed in the graph that appears at the top of the screen.
To configure a stage, click on the graph on the ramp of the stage you want to configure. It will select the stage, which is shown with a blue background in the graph, and load the fields with the values for that stage, allowing you to configure it.
If you have any questions, please contact our technical support:
Telephone: +55 (45) 3037-4040
Email suporte@injepro.com
Whatsapp Technical Support: (45) 9834-0022